
Is your current website host or support company causing more problems than they solve? If you’re dealing with slow performance, unreliable support, or restrictive access that holds your business back, you’ve come to the right place.
The thought of moving your entire website can be daunting. The primary fears are real: suffering from extended website downtime, losing years of critical data, or damaging the SEO rankings you’ve worked so hard to build. It’s enough to make anyone hesitant.
This guide is designed to be your roadmap. We will provide a comprehensive, step-by-step checklist that demystifies the process, helps you mitigate every risk, and empowers you to make the best decision for your business—whether you handle it yourself or hire a professional.
Key Takeaways
- Preparation is Everything: A successful migration begins long before you move any files. A full backup, a pre-migration SEO audit, and gathering all necessary credentials are non-negotiable first steps.
- Choose Your Method Wisely: You can migrate your site manually, with a plugin, or by hiring a managed service. The best choice depends on your technical skill, time, and tolerance for risk.
- Follow a Detailed Checklist: From creating a staging site to updating your DNS, a methodical, step-by-step process is the key to preventing errors and ensuring a smooth transition.
- Post-Migration is Critical: Your work isn’t done when the site is live. Thorough testing, monitoring SEO, and ensuring ongoing maintenance are essential for long-term success on your new host.
Why You’re Right to Consider a WordPress Migration
If you’re researching how to migrate away from an unreliable WordPress support provider, your reasons are likely valid. Moving your site isn’t just a technical task; it’s a strategic business decision to secure a better future for your online presence.
You Need a Reliable Partner, Not Just a Host. Unresponsive support can bring your business to a standstill. When something breaks, you need an expert who acts as an extension of your team, not a support ticket that goes unanswered for days.
You Need Control and Ownership. Many providers create restrictive “lock-in” environments where you don’t have full control. You should always have complete ownership of your website, including backend access and the ability to get a full backup of your files and database whenever you need it.
You Need to Mitigate Risk. A slow, insecure, or frequently offline website is a liability. Poor performance hurts user experience and SEO, while security vulnerabilities put your data and reputation at risk. These are significant business risks that justify a move to a more stable environment.
Your Business Needs are Evolving Your support needs can change. You might need intensive help with updates right after migrating but later transition to a simple, affordable maintenance plan. A good partner should offer flexible support that adapts to your business, not a rigid, one-size-fits-all contract.
Before You Move: Your Essential Pre-Migration Checklist
Proper preparation is the single most important factor in a successful website migration. Rushing this stage is a recipe for disaster. Follow these steps to set the foundation for a smooth transition.
- Perform a Complete Website Backup This is your ultimate safety net. Before you do anything else, secure a full backup of your site. A complete backup includes two key components: your website files (themes, plugins, images) and your database (posts, pages, user comments, settings).
- Gather All Your Credentials Create a secure document with all the login details you’ll need for both your old and new environments. This includes:
- Current hosting panel login (e.g., cPanel, Plesk)
- FTP/SFTP credentials
- WordPress admin username and password
- Domain registrar login (where you bought your domain name)
- Conduct a Pre-Migration SEO Audit An SEO audit creates a baseline of your site’s performance. This allows you to accurately measure the impact of the migration and quickly spot any issues that arise after the move.
As the experts at WPBeginner note, performing an SEO audit before you migrate is crucial: “An audit can reveal issues like your pages are missing SEO titles or if there are images without alt attributes. These errors can hurt your SEO when the website is migrated.”
- Choose Your New Host/Support Partner Evaluate potential partners based on what your business truly needs. Look for a provider that offers excellent performance, robust security features, responsive and knowledgeable support, and transparent pricing.
3 Ways to Migrate Your WordPress Site (And How to Choose)
There are three primary methods for migrating a WordPress site. The right choice depends on your technical confidence, the complexity of your site, and your budget.
| Method | Technical Skill Required | Time Commitment | Cost | Risk Level |
|---|---|---|---|---|
| Manual Migration | Expert | High | Low (Free) | Very High |
| Plugin Migration | Intermediate | Medium | Low ($) | Medium |
| Managed Service | None | Low | Medium ($$) | Very Low |
Option 1: The Manual Method (For the Tech-Savvy)
This involves using an FTP client to download all your website files, exporting the database via a tool like phpMyAdmin, uploading everything to the new server, and then manually editing the wp-config.php file to connect the new database. This method offers total control but is highly technical and prone to error. It should only be attempted by experienced users.
Option 2: Using a Migration Plugin (A Good DIY Middle Ground)
Plugins like All-in-One WP Migration or Duplicator are designed to package your entire site into a single file that can be easily uploaded to your new host. This is a solid option for simpler websites and is far less risky than a manual transfer. However, issues can still arise with large sites or complex server configurations.
Option 3: Professional Managed Migration (The Zero-Risk Approach)
This is the most hands-off and reliable option. A professional service executes a proven process that includes creating a staging site for testing, performing verified backups, and managing the final switch to ensure zero downtime. This approach removes the technical burden and risk from your shoulders.
Pro-Tip: What to Ask Your Migration Partner Before you commit, ask any potential support company if they guarantee full site ownership, provide unrestricted access to your files and database, and have a clear fallback plan. At Pronto, we believe transparency and client control are non-negotiable.
Pronto’s Simple, Six Step Done-With-You WordPress Migration Checklist
At Pronto, we provide a zero-risk managed-service WordPress migration approach. We handle 80% of the migration for you. 20% still has to be done by you, but that means you remain in full control of your website’s most critical accounts. That said we’ll walk you through every step of the process.
1. WordPress Admin Access
Make sure you have administrator login credentials for your WordPress site. This gives you full control to install plugins, update themes, and export content. Without this access, your options will be limited.
Checklist:
- WordPress admin username and password
- Ability to log in at yoursite.com/wp-admin
2. Hosting or Server Access
Depending on how your site is currently managed, you may also need:
- cPanel or hosting account credentials (for shared hosting)
- SFTP/FTP login (for direct file access)
- Database access (usually via phpMyAdmin)
This allows you or your new provider to move all files and databases to the new server.
3. A Full Website Backup
The easiest way to migrate your site is with a complete backup. This usually comes in the form of a zip file containing:
- Your WordPress database
- Theme and plugin files
- Media uploads (images, documents, videos)
Ask your current provider for a backup “for your records.” Even if you’re not ready to migrate yet, it’s a smart safeguard.
4. Domain Registrar Access
To point your site to the new host, you’ll need access to your domain registrar (e.g., GoDaddy, Namecheap, Google Domains). This is where you’ll update your DNS records so visitors land on the new server.
Checklist:
- Registrar login details
- Ability to edit DNS (A records, CNAME, etc.)
5. Staging Environment (Provided by Your New Host)
A reliable provider will set up a staging site during migration. This allows you to:
- Review your site before going live
- Test functionality and forms
- Confirm everything looks correct
This step ensures a seamless launch with little to no downtime.
6. Ongoing Support Plan
Once you’ve migrated, consider your long-term needs:
- Do you want full-service support with regular updates and changes?
- Or is a maintenance-only plan (backups, security, updates) enough?
Choose a provider that offers flexibility, so you can adjust your support level as your business evolves.
After the Move: Your Post-Migration Go-Live Checklist
Once the files and database are on the new server, a few critical steps remain to complete the process and ensure everything works perfectly.
- Update Your DNS Records
Your Domain Name System (DNS) records tell browsers where your website is located. To make your new site live, you must log in to your domain registrar and point your domain to the new server’s IP address. This change can take a few hours to “propagate” across the internet. - Thoroughly Test Everything
Don’t assume everything works. Go through your site with a fine-toothed comb and check the following:- All front-end pages for broken images or formatting errors.
- Internal links, navigation menus, and buttons.
- Contact forms, newsletter sign-ups, and other forms.
- E-commerce checkout processes, if applicable.
- WordPress admin area functionality.
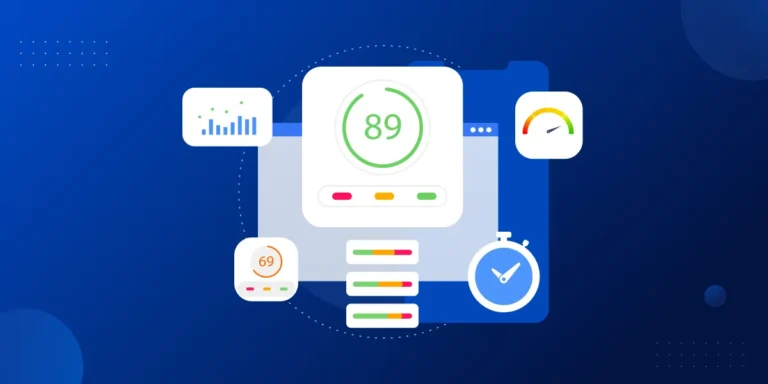
- Run a Final SEO Audit
Just as you did before the migration, run another SEO audit to catch any new issues. This will help you find broken links, missing metadata, or other problems that could have been introduced during the move.As WPBeginner recommends, “Once you’ve completed the migration process, it is a best practice to run an SEO audit of your website again. This way, you will catch any issues that might have been raised during the migration.”
- Monitor Your Site and Decommission the Old Hosting
Keep your old hosting account active for about a week after going live. This gives you a fallback if a major issue is discovered. Once you are confident the new site is stable, you can cancel your old hosting plan.
What If Something Goes Wrong? Your Migration Fallback Plan
Even with careful planning, things can go wrong. A solid fallback plan turns a potential catastrophe into a manageable hiccup.
The Power of the Backup. Your first and most important fallback is the complete, pre-migration backup you made. If the new site has critical errors, you can simply point your DNS back to the original host and restore the backup to get your old site back online immediately.
The Role of a Staging Environment. Using a staging (or test) site is a professional best practice. A staging site is a private copy of your migrated website where you can test everything thoroughly before it goes live. This prevents most issues from ever affecting your public-facing site.
When Migration Isn’t an Option. Sometimes, a site is too outdated, broken, or poorly built to be migrated cleanly. In these rare cases, the best path forward might be a fresh start.
At Pronto, we have a professional fallback plan for this scenario. If a direct migration proves impossible for one of our clients, we offer a discounted website rebuild to ensure they still end up with a high-performing, secure, and modern site on our platform.
A Smooth Transition is Within Reach
Migrating a WordPress site is a significant project, but it is entirely manageable when you follow a clear plan focused on preparation, methodical execution, and thorough testing.
While a DIY migration is possible for those with the time and technical skills, the risks of downtime, data loss, and SEO damage are very real. The value of an expert partner isn’t just in their technical ability; it’s in their proven processes that eliminate that risk entirely.
Moving to a better host and support partner is an investment in your business’s stability, security, and growth. You’ve taken the first step by getting informed—now you’re ready to make your move with confidence.
Ready to migrate but prefer to leave the risk and technical details to the experts? Learn more about Pronto’s Seamless WordPress Migration Service and let our team ensure a zero-downtime transition for your website.
A successful migration is just the beginning. Discover how our Flexible WordPress Maintenance Plans can keep your newly migrated site secure, fast, and always up-to-date.